I bought a neat felt Poinsettia at a craft show and wanted to make some more to put on one of my Christmas Trees this year. Once I figured out how to replicate the one I bought, I thought I'd share with you. You will need:
Maroon felt or wool (ofcourse you could use white or pink!)
3 Rusty Jingle Bells
Black embroidery thread
Wire coat hanger - approx. 8"
First you will need to make your template. I used a 3" long by 1" wide rectangle. Round off one end with your scissors and gradually point the other end so you have a raindrop shape.
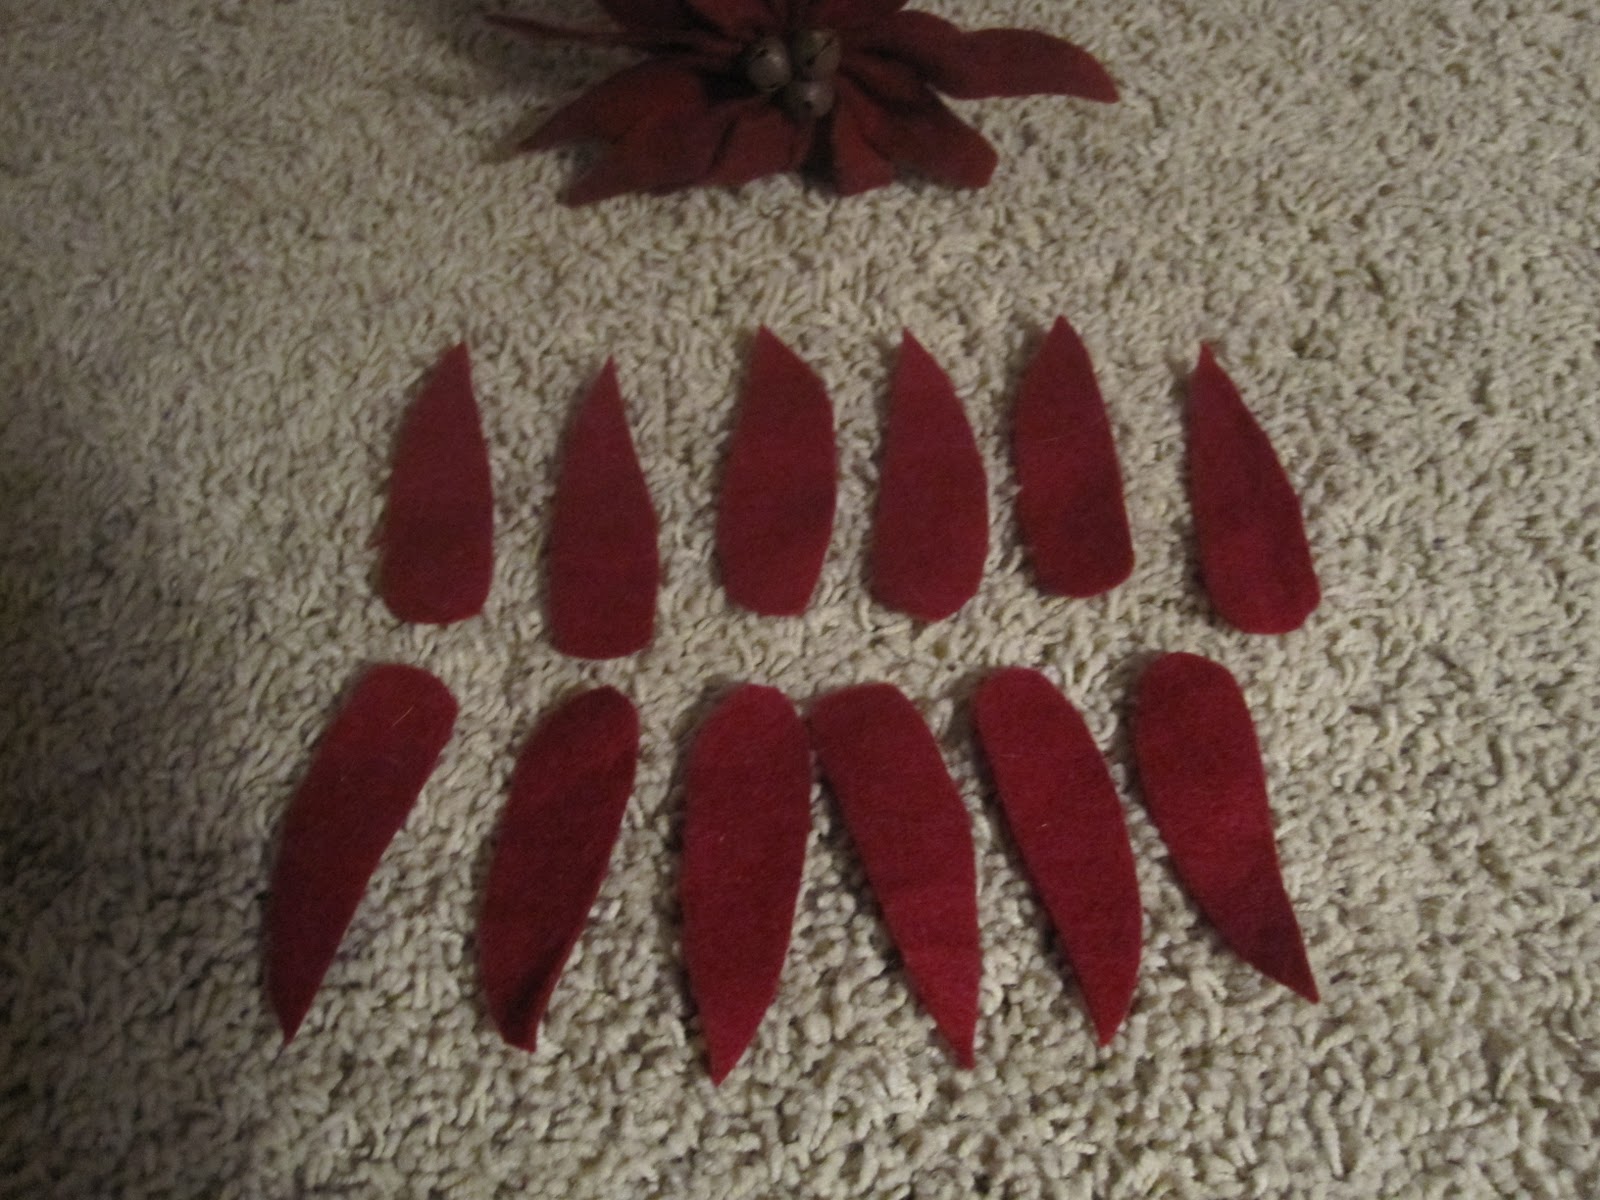
Cut 12 petals.
Using a 2' long piece of embroidery thread, take 2 large basting stitches through the large end of one petal. Keep adding petals until you have all on. Pull up your stitches to bring the petals together in a circular shape.

Don't cut your thread! Bring thread to front and add 3 rusty jingle bells. I anchored each bell separately, I didn't add them all on the thread and then attach. I felt they would hold better anchored separately.

You can add a section of wire coat hanger at this point. Simply slip it through and anchor it under the bells in the front. Leave the long end hanging down the back - maybe 8". This way you can tie or wrap to your tree or wreath if you want.

Last step - spray with Walnut Ink. Make sure to lay your flower on wax paper to protect your counters!

My first flower is drying on the counter overnight. I suppose you could put this in the oven at the lowest temperature - just watch to make sure it doesn't burn.

Have fun and let me know if these directions work (or don't work!) for you.
Have a good week. ~Ann


oooh you read my mind Ann!!...I've been wanting to make some of these...I'll try them over the weekend and let you know!! Thanks, patti ;)
ReplyDeleteThanks for this - I bought 2 a few years ago and now i too can make more! Your the best!
ReplyDeleteAnn what a fantastic tutorial - and so easy!
ReplyDeleteI think I can even make this one.
thanks for sharing
Karen
gorgeous and thanks for that tutorial!!!! They will look great on my tree!!!!
ReplyDeleteSo easy that even I can do it. Thanks for the tips
ReplyDeleteI am all over this project..I have a couple of friends who come over once a week for craft night..This definetly will be our next one for sure but first I will do a dry run on Saturday..Thanks for the tutorial..
ReplyDeleteLooks wonderful - I'll give it a try.
ReplyDeleteAnn,
ReplyDeletethese are just too cute!
Thanks for sharing!
Hugs,
Kerri
Love this! Thanks for sharing the "how to"!
ReplyDeleteHugs,
Donna
Very nice! I love this. Thanks for posting!
ReplyDeleteCathy